Getting salon-quality nails at home has never been easier with the right techniques and tools. Professional nail technicians and beauty experts at Health Articles Magazine recommend structured gel manicures for their durability and flawless finish. This comprehensive guide will walk you through every step needed to achieve stunning results.
Structured gel manicures have revolutionized the nail industry by combining strength with flexibility. Unlike traditional polish, these manicures create a supportive framework that extends nail length while maintaining natural movement. Understanding the structured manicure meaning is essential before beginning this process, as it involves building layers of gel to create both length and durability.
The popularity of structured gel manicures continues to grow among nail enthusiasts worldwide. These manicures offer superior longevity compared to regular gel polish while providing the flexibility to create various shapes and lengths. Additionally, they protect natural nails from damage and breakage.
What You’ll Need for Your Structured Gel Manicure
Before starting your manicure, gather all necessary supplies to ensure a smooth process. Professional-grade products will deliver the best results and longest-lasting wear.
Essential tools include a nail file, buffer, cuticle pusher, and nail forms or tips. You’ll also need base coat, builder gel, top coat, and a UV or LED lamp for curing. Furthermore, having rubbing alcohol and lint-free wipes will help maintain cleanliness throughout the process.
Quality matters significantly when selecting your gel products. Choose reputable brands that offer consistent formulas and reliable curing times. However, expensive doesn’t always mean better, so research reviews and recommendations from experienced users.
Preparing Your Natural Nails
Proper nail preparation forms the foundation of any successful structured gel manicure. Start by removing any existing polish completely using acetone-based remover. Therefore, your nails will be clean and ready for the new application.
Push back your cuticles gently using a cuticle pusher or orange stick. Trim any excess cuticle skin carefully to prevent lifting later. Next, shape your natural nails to your desired length, keeping them slightly shorter than your final goal.
Buff the nail surface lightly to remove shine and create better adhesion. Clean each nail with rubbing alcohol to remove oils and debris. This step is crucial for preventing lifting and ensuring long-lasting results.
Applying the Base Layer
Begin with a thin layer of base coat on each nail, avoiding the cuticle area and sidewalls. The base coat creates a protective barrier between your natural nail and the builder gel. Cure this layer under your UV or LED lamp according to manufacturer instructions.
After curing, check for any areas that might need touch-ups. However, avoid applying the base coat too thickly, as this can cause bubbling or uneven surfaces. Clean application techniques will set you up for success in the following steps.
Most base coats require 30-60 seconds of curing time under LED lamps or 2 minutes under UV lamps. Check your product specifications to ensure proper curing, as under-cured gel can lead to premature chipping.
Building the Structure with Builder Gel
This step creates the strength and length characteristic of structured manicures. Apply nail forms or tips if you’re extending length beyond your natural nails. Position them carefully to match your natural nail curve and secure them firmly.
Begin applying builder gel in thin layers, starting from the cuticle area and working toward the free edge. Build up the apex (highest point) of the nail for maximum strength. Additionally, ensure smooth transitions between layers to avoid visible lines.
Cure each layer completely before applying the next. Most builder gels require 2-3 coats to achieve proper structure and opacity. Therefore, patience during this phase will reward you with professional-looking results.
Shaping and Refining
Once your builder gel layers are complete and cured, it’s time to shape your nails. Use a coarse nail file to rough out your desired shape, then switch to progressively finer grits for smoothing.
File in one direction when possible to prevent splitting or damage. Pay special attention to the sidewalls and free edge, ensuring they’re even and symmetrical. However, take your time during this step, as rushing can lead to uneven results.
Buffer the entire nail surface to remove any imperfections and create a smooth base for your topcoat. Clean away all dust with a brush or lint-free wipe before proceeding to the final steps.
Applying Color and Top Coat
If you’re adding color, apply thin coats of gel polish, curing between each layer. Two coats typically provide full opacity and rich color payoff. Nevertheless, some lighter shades may require additional coats for complete coverage.
Finish with a high-quality top coat to seal your manicure and add shine. Apply the top coat carefully, ensuring complete coverage including the free edge. This final layer protects your color and extends the life of your manicure.
Cure the top coat according to manufacturer instructions. Some top coats leave a sticky residue that needs removal with rubbing alcohol, while others cure to a complete finish.
Aftercare for Long-Lasting Results
Proper aftercare ensures your structured gel manicure lasts 3-4 weeks or longer. Apply cuticle oil daily to keep the nail area hydrated and healthy. This prevents lifting around the cuticle area and maintains flexibility.
Wear gloves when cleaning or doing dishes to protect your manicure from harsh chemicals. According to nail care experts at Allure Magazine, proper protection can extend manicure life significantly.
Avoid using your nails as tools for opening packages or scratching surfaces. These actions can cause chips or breaks that compromise the entire manicure.
Troubleshooting Common Issues
Lifting around the cuticles usually indicates insufficient nail preparation or oil contamination. Ensure thorough cleaning and proper pushing back of cuticles before application. Additionally, avoid getting product on the skin during application.
Bubbles in the gel often result from shaking the bottle or applying coats too thickly. Gently roll the bottle between your hands instead of shaking, and apply thin, even layers.
Chipping typically occurs when layers aren’t properly cured or when the nails experience trauma. Always cure for the full recommended time and protect your manicure during daily activities.
Professional Tips for Success
Temperature affects gel application and curing. Work in a room temperature environment for best results. Cold conditions can make gel thick and difficult to apply, while excessive heat can cause premature curing.
Clean your brushes regularly during application to prevent contamination and ensure smooth application. Use brush cleaner or rubbing alcohol to maintain optimal performance.
Practice makes perfect with structured gel manicures. Start with shorter lengths and simpler shapes while building your skills. Therefore, you’ll gain confidence and technique with each application.
Conclusion
Mastering structured gel manicures at home requires patience, practice, and quality products. Following these detailed steps will help you achieve salon-quality results that last for weeks. Remember that proper preparation and technique are more important than expensive tools.
The key to success lies in taking your time with each step and not rushing the process. Additionally, investing in quality products and maintaining proper aftercare will ensure beautiful, long-lasting results that rival professional salon work.
Frequently Asked Questions
How long do structured gel manicures last? Structured gel manicures typically last 3-4 weeks with proper application and aftercare. However, individual nail growth rates and daily activities can affect longevity.
Can I do structured gel manicures on short nails? Yes, structured gel manicures work on any nail length. The technique adds strength and can help protect short nails while they grow.
What’s the difference between regular gel and builder gel? Builder gel is thicker and designed to create structure and length, while regular gel polish is primarily for color and shine. Builder gel provides the framework for structured manicures.
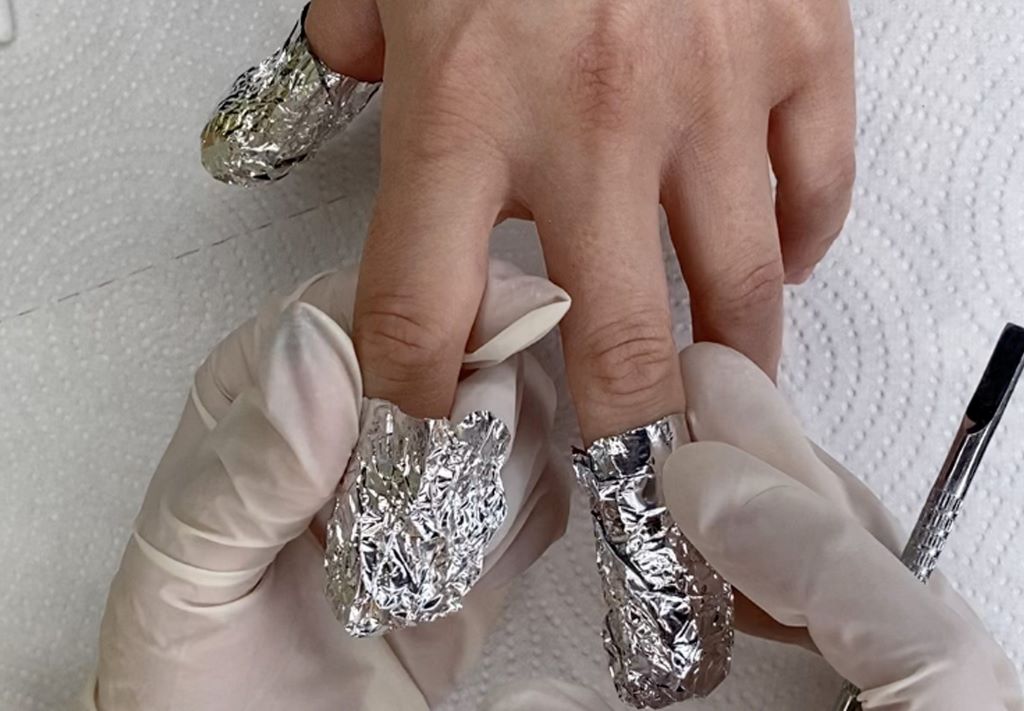
How do I remove a structured gel manicure? Soak nails in acetone for 10-15 minutes, then gently push off the softened gel. Never force or peel off gel manicures, as this can damage natural nails.
Can structured gel manicures damage my natural nails? When applied and removed properly, structured gel manicures don’t damage natural nails. However, improper removal or over-filing can cause damage, so technique is important.
Read More:
SQUOVAL NAILS: SAFE OF YOUR NAILS?